Saturday, April 30, 2011

FNG

Traci and I are proud to aanounce the birth of our son Liam yesterday, April 29th. Weighing in at 10lbs 0oz, we are going to have to make sure to keep our new crew member's weight forward on the boat!

We need to get Tim Ford working on an i550 "onesie" to go with the baseball caps!

And, FYI, that's "fussy new guy". ;)

Wednesday, December 15, 2010

Long Time, No Post

It's been a long while since the last post. This fall we had the opportunity to get three i550s on the water here in Madison on Lake Mendota.  We had very light conditions, but managed to get four races in over a short weekend.

Ron Bowman of Lunatic Fringe took home the coveted "Epoxy Cup" with three bullets.

Below area a few pics from the weekend!


Monday, July 12, 2010

Will it float?

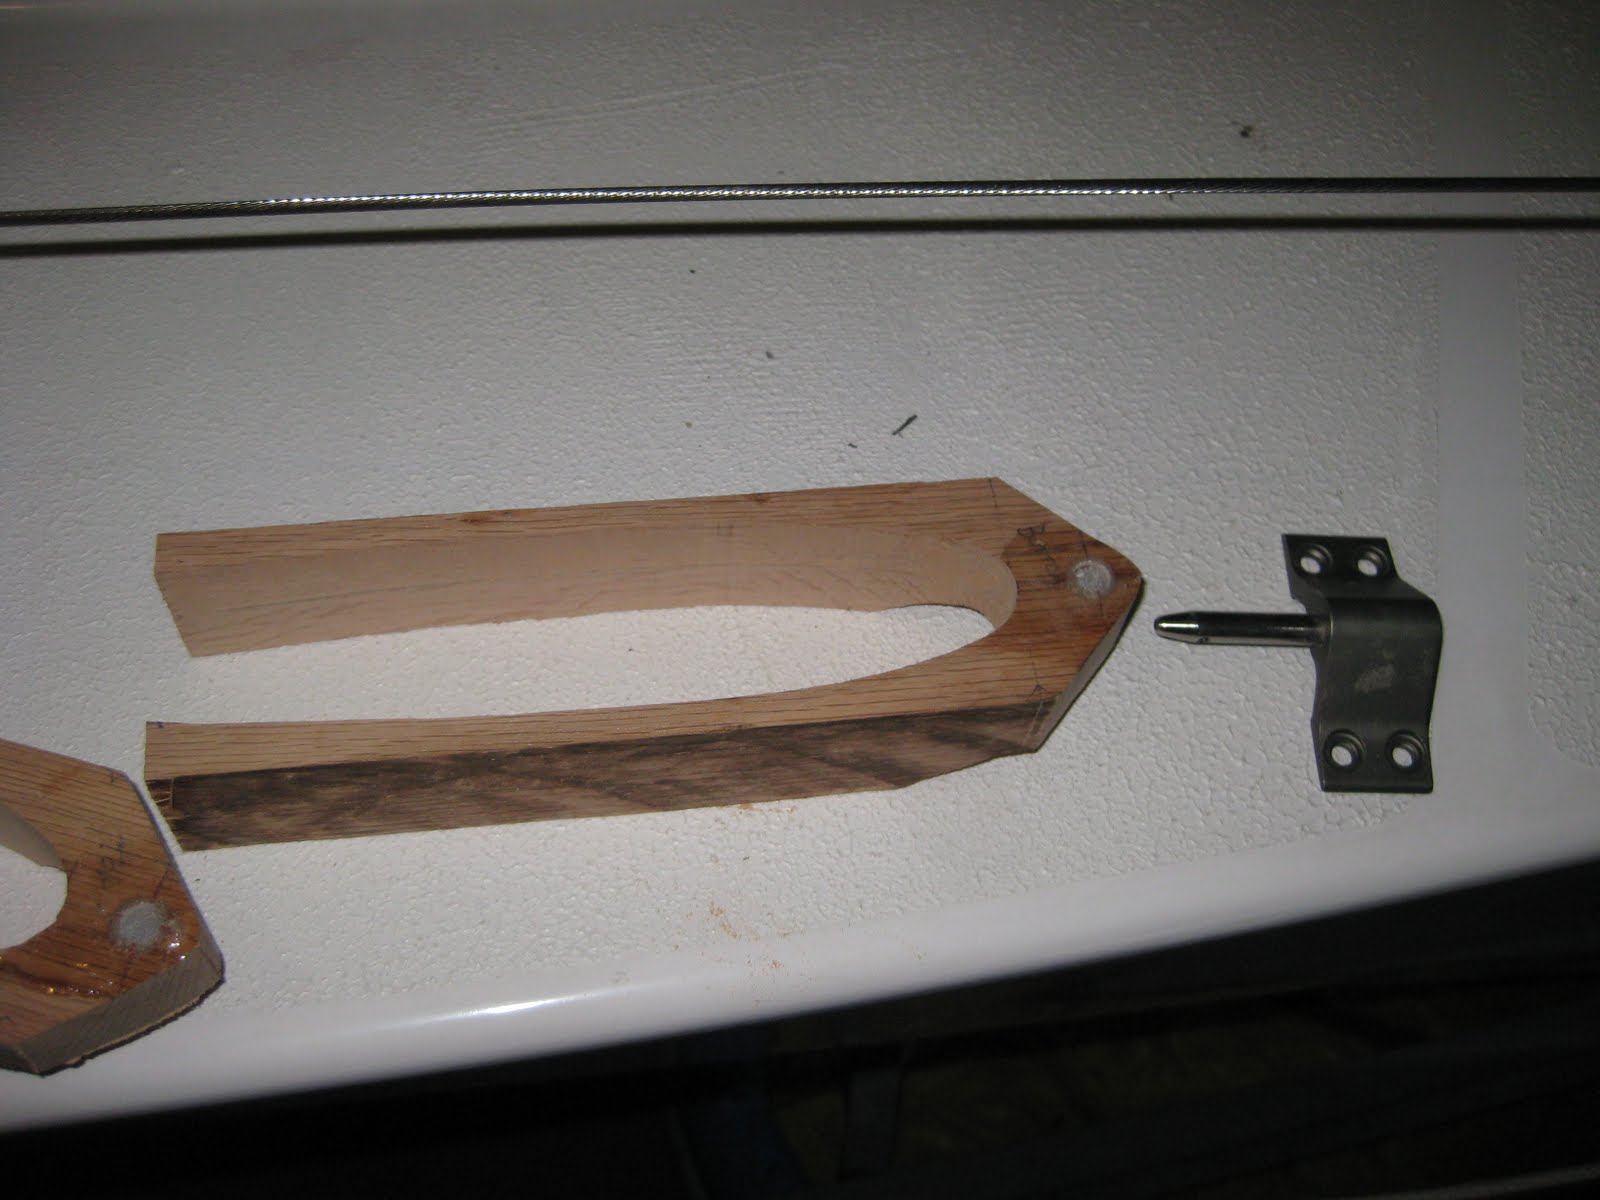
We successfully launched Alchemy for the first time on two weeks ago.  We got the sails up and cruised around for twenty minutes or so before the rudder cassette failed.  It turned our that the combination of foam covered with carbon that I used for the gudgeons was not sufficiently strong even in moderate breeze.


So the maiden voyage was not completely successful.  I ended up carving out the foam and replacing it with oak.  This may have been overkill but I know that the rudder cassete will be bulletproof.


I ultimately covered the oak with a layer of carbon uni running parallel to the to the oak and two layers running at +45deg and -45 deg to the oak.  We relaunched this Saturday.  Traci sat this one out and instructed my dad and I to "go try to break the boat".  I love the encouragement!

The beeze was about 6-9kts.  We had a really nice sail.  The boat was surpisingly fast up wind in that breeze with just the two of us on board. It felt like we nearly got the boat to plane upwind at one point.  Nearly, but not quite.  Down wind was equally pleasurable, after we got a few rigging issues sorted out.  First the cams for the pole deploy and tackline did not want to stay closed.  i will need to change the lead on these slightly.  Then the spin sheets turned out to be a bit too short.  That allowed us to do exactly one jibe---which was hilarious.  on the following long jibe, we had a good chance to try to get a feel for the boat.   Things felt pretty good downwind. There was a bit of a tendancy to round up in the puffs, but that was more about my feel on tiller.  As we progressed on that board, my ability to anticipate the puffs and steer down increased.  The speed gains seemed to be good, although we did not have a reliable GPS (MotionX on an iPhone does not do the trick).


So we have a few things to iron out this week and we will be back at on the water again soon!

Monday, June 21, 2010

PHRFect? Maybe, maybe not...

The i550 now has a rating in Lake Michigan PHRF! The magic number is 120. Yes, it seems rather low. My guess is that the committee in their infinite wisdom decided to rate the boat fast since they weren't sure WTF they were dealing with. Hey, at least they took the step to rate the boat. Good on them for that. We will see how she goes with the club racing here in Madison. PHRF ratings for new designs are naturally in flux.

I expect the certificate by mail tomorrow and will post it here for everyone's reference.

http://www.lmphrf.org/Look_Up_a_Handicap/search.pl?number=&name=Alchemy&type=&bhcp=

In other news, Traci and I are finally getting settled into our new house so actual work has resumed on the boat.  I've got the rudder cassette re-fitted, the hiking straps mounted, and the keel wet sanded and ready to go on the boat.  we will likely try to get the boat hoisted next weekend to mount the keel.

We're back!!  Stay tuned!

Sunday, March 28, 2010

Show Time!

Kevin McDaniel (builder of Pipedream) and I were asked to display our boats at an event at Crowley's Yachtyard in Chicago in conjuction with epoxy manufacturer West System, who is also building an i550.  We had lots of folks show interest in the boat, and several were already familiar with the boat an came to the show to see them.  Pertty cool!


All in all, it was a really great day for the i550!  Hopefully we will get a few more builders in the Midwest.

Saturday, March 6, 2010

Long Winter's Nap

At long last, I pulled the boat out of the storage unit today. Temps were in the high 40s here in Madison, so (with Traci's help) I stepped the mast and hoisted the jib to nark for the jib tracks.


On to drill and fill and redrilled for the jib tracks and finish up a few other miscellaneous items so I can be ready as soon as the lakes thaw!

Saturday, November 7, 2009

Man of the Cloth

Well, it was 70 degrees today in Madison. A little indian summer is nice!

I picked up the main and jib this week from Ryan at MadSails, and they look pretty darn good! The luff on the jib is a tad long, so we'll have to work on that, but all in all, I think they look fantastic! See for yourself:


I'm putting a few finishing touches on the boom tonight and then a few coats of paint on the keel and rudder and I will be all set to put her to bed for the winter. :(


Ah, we'll see what the weather gods say over the next few weeks...


Jeff

Sunday, November 1, 2009

Bit and Pieces

Lots of activity in the boatworks since the last post:

I put roughly million layers of fairing filler on the keel, and it's finally ready for primer. I also glassed up the sleeve for the rudder cassette. The same as with the keel I used the faired rudder with a layer of 1/16" foam wrapped around it as a plug. Once I had the sleeve I used that to trace out the shape onto pink insulating foam so that i could create two stiffening members for the cassette.


A layer of carbon uni and the cassette was wicked stiff. Now on to more fairing...

Yesterday, Traci and got the deck hardware fastened down. Guess who got to crawl inside the belly of the little beast to turn the wrench!
Lastly, today I got the rudder cassette partially faired and and dry-fit the tiller and fork to join the two. The tiller and fork pieces and down in the basement now marinatng in thickned epoxy (along with the cassette, which needed another coat of filler!).


Monday, October 12, 2009

Bring on the heavies

So this week and weekend I did some gross tuning on the keel bulb.

I started out by drilling the holes for the cross bolts. I first drilled the recess for the bolt head using a 7/8" standard spade bit. Slow and steady is the name of the game when drilling lead. I know that other builders used loads of cutting oil, but I opted for water as I wanted to avoid extensive cleaning before trying to apply fairing filler. I also set the clutch on the drill to about half to avoid shearing off a drill bit. This worked great. After the countersink was done, I drilled a 7/32" pilot hole through the first bulb half. I then pulled out a 12" long 5/16" diameter brad point bit. With the drill on the low setting, small "bites" into the lead worked awesome. Pulling the bit out to clear it after 50 or so revolutions seemed to be the key. Once I made it through the first half, I laid the bulb over the keel foil to drill that hole, and then laid both on the second bulb half and drilled through. Finally, I drilled the counter sink on the other side.

If I had to do it again, I would have bought a long bit to drill a 1/4" pilot hole all the way through. With a 5/16" hole on the second half, it was difficult to drill the counter sink without the bit wobbling and I had to lug the 80-lb bulb half to my office to use the drill press. Incidentally, I tried a 1" Forstner bit on the second set of countersinks, and when using low RPM, it worked a treat.

OK, so the bolts are drilled and I am good to go, right? But, it turned out that the cast bulb halves contracted quite a bit as they cooled in the mold. This left the a 1/2" - 5/8" gap between the halves when I put then together. A preliminary weighing told me than I was also about 10 lbs below max weight. So I came up with a decent solution to fill the gap and add as much weight as possible. I started by folding a piece of aluminum foil into ~1" strips (probably 8-10 layers thick) and layed the Al strips onto the tacky side of regular old duct tape. I then used my homemade foil tape to create a dam to seal up the gap so that I could do a second lead pour.


My scheme worked great and the duct tape only melted a little. Best of all: no leaks! The second pour probably added about 8 lbs to the bulb weight and I am darn close to max class weight (185lbs for the bulb and keel strut).

I now have a coat of fairing filler on the bulb and fairing continues on the rudder, but it is quite close.

Stay tuned!
Jeff

Monday, October 5, 2009

Melt With You

This weekend I had a go on the rudder and keel bulb.

On saturday I planed the shape of rudder from the laminated blank I made many moons ago. The keel was good practice. :) An electric planer is great when used with care. As with the keel I traced the profile on the ends of the blank and used the planer to "step" down the blank until I hit the line of the profile. I then planed those steps down until I had the foil nearly smooth. From there, I used the planer to cut a nice channel to recieve the carbon fiber lay up of stiffness. I saturated the carbon, layed it in the channel, and then smeared Microlight filled over the whole foil. Sanding to come...

I also poured the keel bulb yesterday. I have to note that Kevin and his wife gave Traci and I the best (my opinion!) wedding gift: an aluminum pot, an iron skillet, a ladel, and a bottle of champagne---all lovingly lead-tainted (maybe not the champagne). I must say, it was the only wedding gift which required hand-washing after opening.


I used Kevin's excellent blog post as a guide. The unseasonably cool weather this weekend (50-55F) and the wind made the job tough and Traci wanted NO part of the Great Lead Melting. Can’t blame her. :) So I was working solo. I think the temp and the wind made the lead slow to melt, so ultimately I ended up placing Kevin's aluminum pot directly over the turkey fryer burner, rather than on top of the iron skillet as he did. This worked fine, but by the time I was done the bottom of the aluminum pot had deformed slightly to match the grates on the burner. Careful if your pot is thin walled!

The pour on the first half was only OK. I don’t think I had enough lead in the pot when I started pouring, so layers started solidifying before I got the next layer poured. I have a couple of layers of lead that don’t seem well adhered so I think I will wrap the bulb with a layer of glass tape to keep everything together. It will also be bolted crosswise to the strut, so I am not all that concerned about the integrity of the bulb.

The second half went much better. I consistently kept more lead in the pot which meant much less time to melt additional pieces and therefore less time between ladlefuls of molten sweetness.

Interestingly (but not surprisingly) the second half, which I poured in a much shorter period of time, contracted significantly when it cooled. It ended up being a ¼” lower than the top of the mold and 6lbs. lighter than the other half (80 lbs.). I think I will get the halves bolted together and then try to seal the gap with heat-resistant mica tape and fill the gap with a small scale pour. Should get me up to weight, I think.


Thursday, October 1, 2009

One more bit of carbon


Light = fast, right? Definitely my favorite piece of hardware on the boat!

Traci and I had an awesome honeymoon in Barbados following an incredible wedding.

Now it's time to get the Boatworks cranking again!

Sunday, September 13, 2009

Angle of the dangle

Since my last post, I've fabricated the tiller. I started with a sheet of pink insulation foam and cut it to rough shape with the jig saw. I then (very gingerly) sanded it with a small electric sander and by hand. When I got the overall shape close to where I wanted I wrapped it with a layer of 9oz cloth to give it some strength so I didn't break it while trying to fair it with Microlight filler. After the tiller was fair I wet out slid on one fiberglass sleeve, one carbon sleeve, and one carbon/basalt hybrid sleeve (all from Soller Composites). I like the results!


I also got the non-skid applied to the cockpit and deck last weekend. I had read good things about Kiwi Grip, so i gave it a shot. The stuff is really easy to apply. Working in 2ft sections I troweled the yogurt-like stuff on with a 1/8" V-notch trowel. The roller they include is great and based on the pressure that you use you can dial in just the right amount of "tooth" to the finish.


The Boatworks will be quiet for a couple of weeks, as Traci and I are off to Lake Geneva tomorrow for our wedding this weekend. Then off to Barbados for a week!

The finishing touches will be put on the boat when we return and we WILL get out sailing before the snow flies!

Jeff


Wednesday, September 2, 2009

Swag


Hey, if I can't sail it yet, at least I can wear the hat!

Monday, August 31, 2009

Mean Machine

Since the last post, my sailmaker (Ryan Malmgren; MadSails) came over to take measurements. He and a colleague on the East Coast are currently building the sails. Should be ready in a week or so.

I've put a couple coats of clear urethane on the stick and have one more to go. I decided to try out an automotive clear coat due to price (~$40/qt.) and availability (local auto parts store). It is supposedly professional grade stuff used in body shops.

I also got all of the holes for deck hardware drilled, filled with thickened epoxy and redrilled. That was the last step before getting a coat of finish paint on the cabin top gunwales and cockpit sides.


Looks pretty bad-ass, if I do say so myself! One more coat tonight and she might be ready for the non-skid paint.

Then on to the things I have been putting off, like melting lead for the keel bulb. :)

Jeff

Tuesday, August 18, 2009

Erection

Last night after work, I made a few minor preparations and Traci and I stepped the mast. We steadied the rig using the jib halyard and two lines from the mast (just above the spreaders) down to the chainplates. I tied a third line above the speaders which I used as a "measuring tape" to ensure that the rig was centered in the middle of the boat.

Once I had the mast positioned where I wanted it, I cut the shrouds to length and attached the Hi-Mod studs. I started with the lowers, then the headstay, then the uppers.


Looks pretty sweet, I think. Hopefully my sailmaker can come by soon to take down some numbers.

Sunday, August 16, 2009

Flippty-Doo-Dah

I owe (another!) huge thanks to a bunch of my co-workers who came over after work on Friday to help flip the boat and get her on the trailer---although I think they would help me move a body for free beer. :)

All went extremely well. Only took about five minutes to roll the boat off the cradle and lift it onto the trailer.


Over the weekend I glued up the mast sections using West System G-Flex 655K, trimmed the mast length to fit within the confines of class rules, and ran the main and jib halyards to assist in the stepping of the rig. I nearly stepped the mast this evening, but ran out of gas. Traci and I will get it stepped tomorrow after work, so our sailmaker can get over here and take measurements.

Stay tuned!

Jeff

Sunday, August 9, 2009

Pretty Fly for a White Guy

I finally got a couple of coats of finish paint on Alchemy this weekend. I am using Interlux Brightside (Blue-Glo White), which is a one-part polyurethane paint. It's not quite as tough as the two-part offerings available, but it is a rather robust finish which my dad and I have had good success with in the past. It gets quite hard after about 30 days.


The original plan was to spray the finish paint on the boat. My dad and I have found that your run-of-mill Wagner consumer-grade HVLP power sprayer is capable of doing a fine job. Naturally, the summer weather here in the Midwest had other plans. To be able to spray (somewhat) efficiently, you need essentially no wind if you are going to be spraying outside (which is a really good idea). I say "somewhat" because spray application is not nearly as efficient as brushing. And when the paint is at least $40 per quart (more for two-part finishes), that might be serious consideration.

Given this weekend's wind and forecast for thunderstorms, I opted to roll-and-tip the finish coats. This technique involves rolling the paint onto the boat in 2-foot-wide sections and lightly dragging a fine brush over the rolled paint to remove bubbles and prevent drips and sags from forming. I have found that the biggest "secret" is that you need to use quite a bit of thinner when you are rolling-and-tipping. Interlux recommends their #333 Brushing Liquid at a maximum of 10% by volume. This, of course, varies with wind, temperature, and humidity. Sorry, no silver bullet here.

By trial-and-error, I found that 5 "cap fulls" per 8oz of paint worked well. The draw back is that you don't get really awesome coverage. The paint goes a long ways: I have put on two coats (with one quart of paint) and one more to do. But there are still a few spots where the primer was thin (or completely sanded off) where I have a dark spot. The best news is that the ratio of thinner to paint that I am using has great leveling capability and very few brush strokes can be detected in the finish. See for yourself below:


I wet-sanded with 320 between coats. This did a good job of taking care of a few sags that I got when I was fine-tuning my method.

Anyway, I am very pleased with how the paint is going on. More wet-sanding tomorrow night probably with 400 grit, and a (hopefully!) final coat on Tuesday.

Stay tuned!

Jeff

P.S. For those of you that don't get the reference in the post title:
http://www.youtube.com/watch?v=f7-E1qTVJgE


Saturday, August 1, 2009

Prime Time, Part 2

After a few hours of sanding and filling tiny fish eyes in the epoxy (and then more sanding!) I got a coat of primer (Interlux Prekote plus a touch of 333 Brushing Liquid) on the hull. I rolled and tipped the primer. Unfortunately, the primer didn't flow out like I wanted it to (streaky), but it will get sanded anyway. Hull seems pretty fair, so I am happy with the result. I still need to hit a few spots with spot filler tomorrow, and then maybe finish coat.


Over the last couple days, I also faired in the spin pole tube. I cut a couple of pieces of plywood for the top and bottom and one for the front end. A little thickened epoxy, and layer of cloth, and some fairing filler end it looks pretty darn good. I've got a thin coat of epoxy on it tonight so hopefully it should be cured up and ready for paint tomorrow.


OK, that's it. I'm bushed. More tomorrow.

Jeff

Saturday, July 25, 2009

Happy Trails

Well, at least one thing is actually done: the trailer.


I wanted to be sure the trailer was ready before the boat was painted so that it could be flipped right onto the trailer. To finish off the trailer, I painted the bunks with an oil-based paint (grey to match the galvanizing) and then glued polyethylene foam to the supports that would contact the hull. A little "googling" suggested that plain old Weldwood Contact Cement would do the trick in gluing a normally tough-to-adhere polyolefin like polyethylene to the wood. At six hours in so far, so good. :) Now if the boat fits in there I'll be all set.

I also got another coat of epoxy on the hull, but that looks just like it did two days ago before I sanded so I didn't post a picture.

Wednesday, July 22, 2009

To do list...

Lots of little things going on.

As you can see below the boat was flipped and a couple of weeks ago Traci and I got the entire hull covered in 6oz glass cloth. We used a 60" wide roll (from US Composites) which covered from the centerline down to the rail with a couple inches to spare. I had originally order a 25yd roll. Early we glassed the topsides, and when we got to the hull we were exactly 1ft short. Typical. :) This was not a huge problem since there was extra cloth near the bow. So we seamed in the port half of the transom. I was fairly precise when I was doing the topsides; 30yds or so would give you ample margin for error.


Since the boat is upside-down, it took the opportunity to create a couple of bunks for the trailer out of 1/4" meranti and 1/2" doug fir. If I did it again I would go with 3/4" ply for the uprights. As it is, I added a couple of vertical pieces scrap cedar to each bunk to stiffen them up a touch.

In other news, my standing rigging arrived today from Rigging Only. Looks good! I am going with stainless rigging, rather than the fancy ($$) poly stuff. I had rigging only swage the t-balls on the upper ends and they left the lower end raw for attachment to a Hi-Mod stud which will go into the turn buckle body.

On the immediate to do list is getting a second coat of epoxy on the port side of the hull, getting a few small spots along the centerline faired, and then shooting some primer.

God, I want to go sailing...